例程讲解07-Face-Detection->face_tracking人脸追踪
import sensor, time, image
sensor.reset()
sensor.set_contrast(3)
sensor.set_gainceiling(16)
sensor.set_framesize(sensor.VGA)
sensor.set_windowing((320, 240))
sensor.set_pixformat(sensor.GRAYSCALE)
sensor.skip_frames(time = 2000)
face_cascade = image.HaarCascade("frontalface", stages=25)
print(face_cascade)
kpts1 = None
while (kpts1 == None):
img = sensor.snapshot()
img.draw_string(0, 0, "Looking for a face...")
objects = img.find_features(face_cascade, threshold=0.5, scale=1.25)
if objects:
face = (objects[0][0]-31, objects[0][1]-31,objects[0][2]+31*2, objects[0][3]+31*2)
kpts1 = img.find_keypoints(threshold=10, scale_factor=1.1, max_keypoints=100, roi=face)
img.draw_rectangle(objects[0])
print(kpts1)
img.draw_keypoints(kpts1, size=24)
img = sensor.snapshot()
time.sleep_ms(2000)
clock = time.clock()
while (True):
clock.tick()
img = sensor.snapshot()
kpts2 = img.find_keypoints(threshold=10, scale_factor=1.1, max_keypoints=100, normalized=True)
if (kpts2):
c=image.match_descriptor(kpts1, kpts2, threshold=85)
match = c[6]
if (match>5):
img.draw_rectangle(c[2:6])
img.draw_cross(c[0], c[1], size=10)
print(kpts2, "matched:%d dt:%d"%(match, c[7]))
img.draw_string(0, 0, "FPS:%.2f"%(clock.fps()))
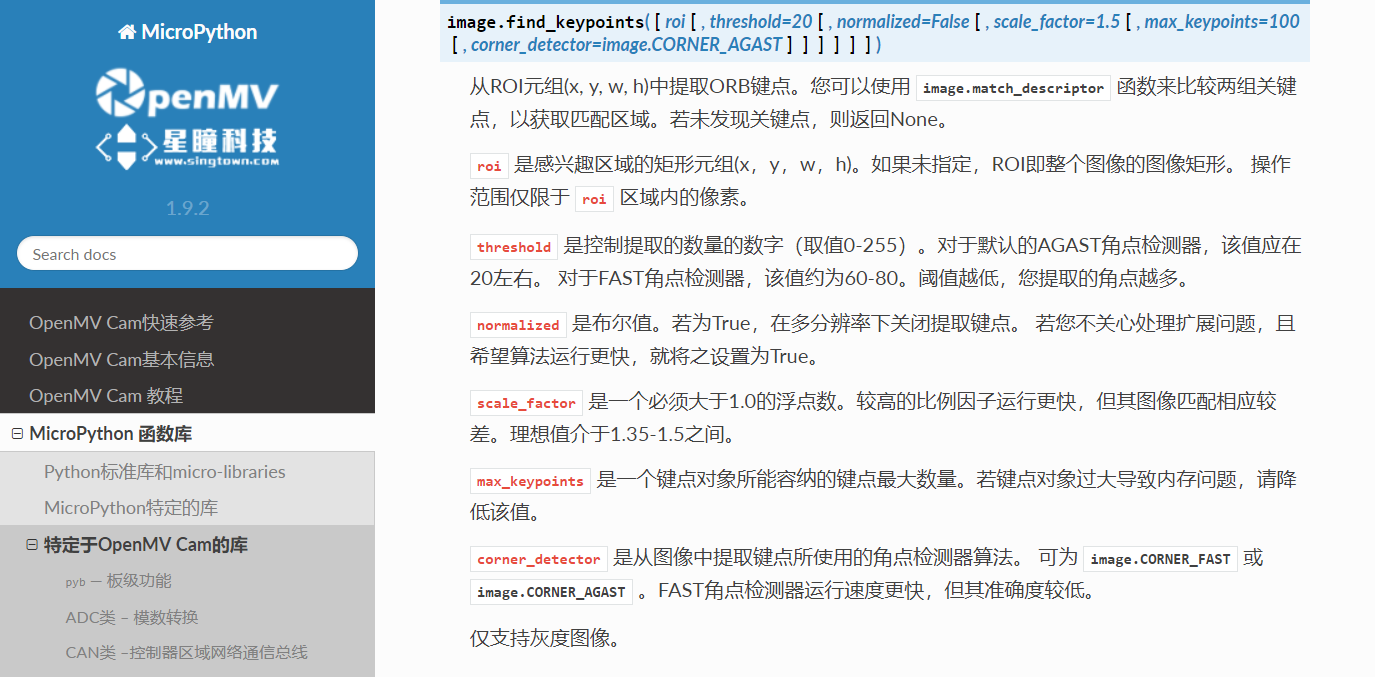
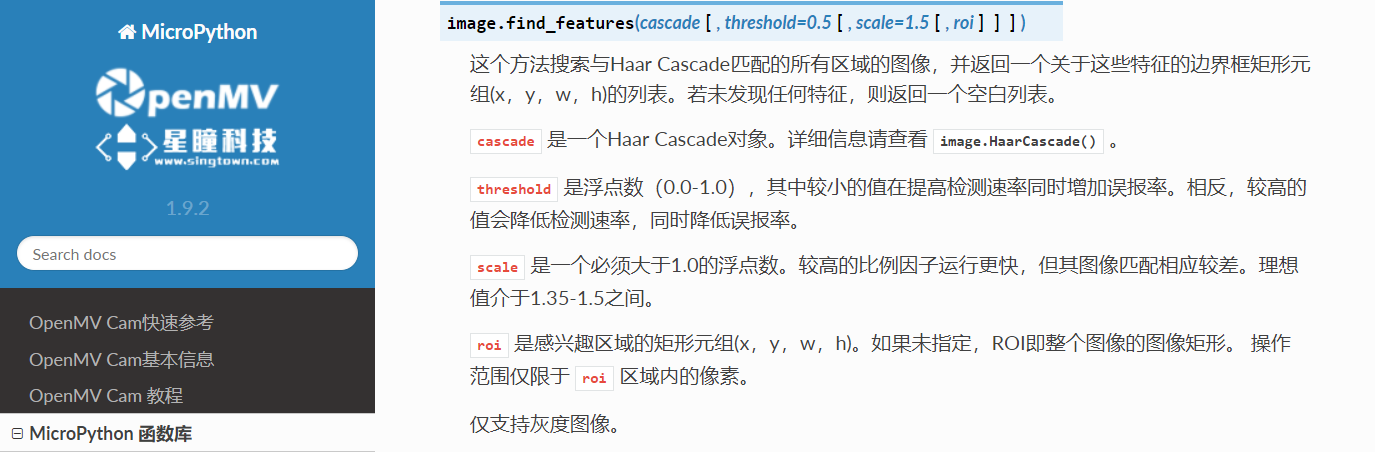
星瞳科技OpenMV官方中文文档函数讲解:
星瞳科技OpenMV官方中文文档函数讲解: