巡线小车
视频教程20 - 巡线小车:https://singtown.com/learn/50037/
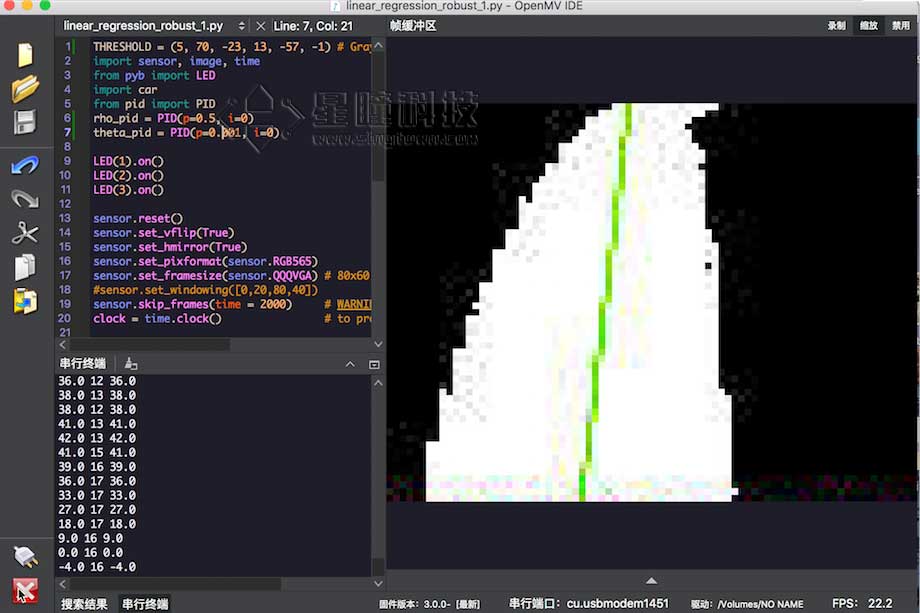
这个例子展示了在OpenMV Cam上使用get_regression()方法获得ROI的线性回归。使用这种方法,可以轻松让机器人跟踪所有指向相同大致方向的线。
本例程可以用于机器人巡线,效果非常好。
追小球的小车
视频教程9 - 追小球的小车:https://singtown.com/learn/49239/
准备材料
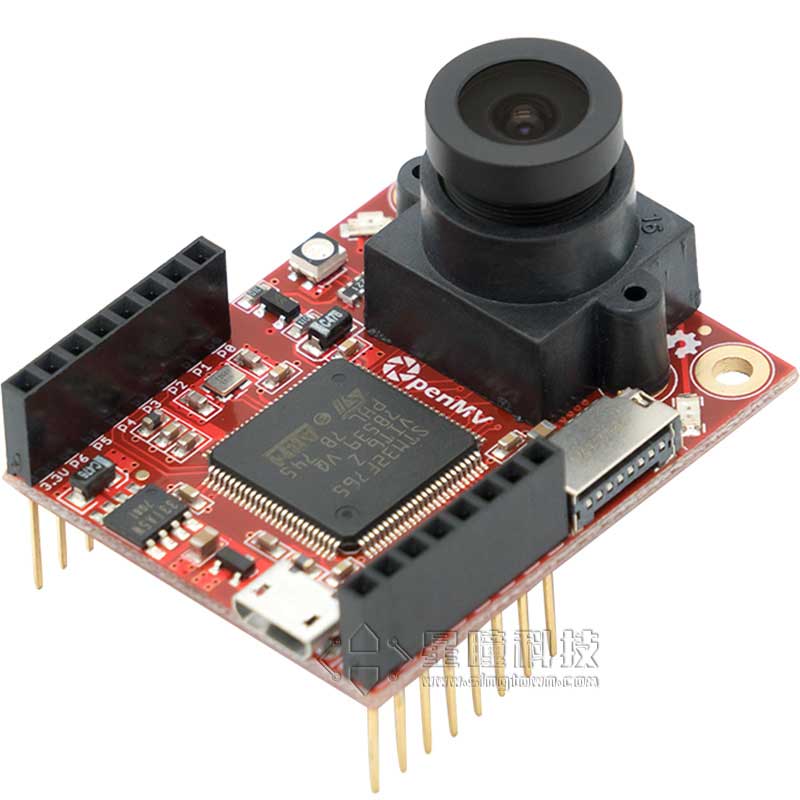
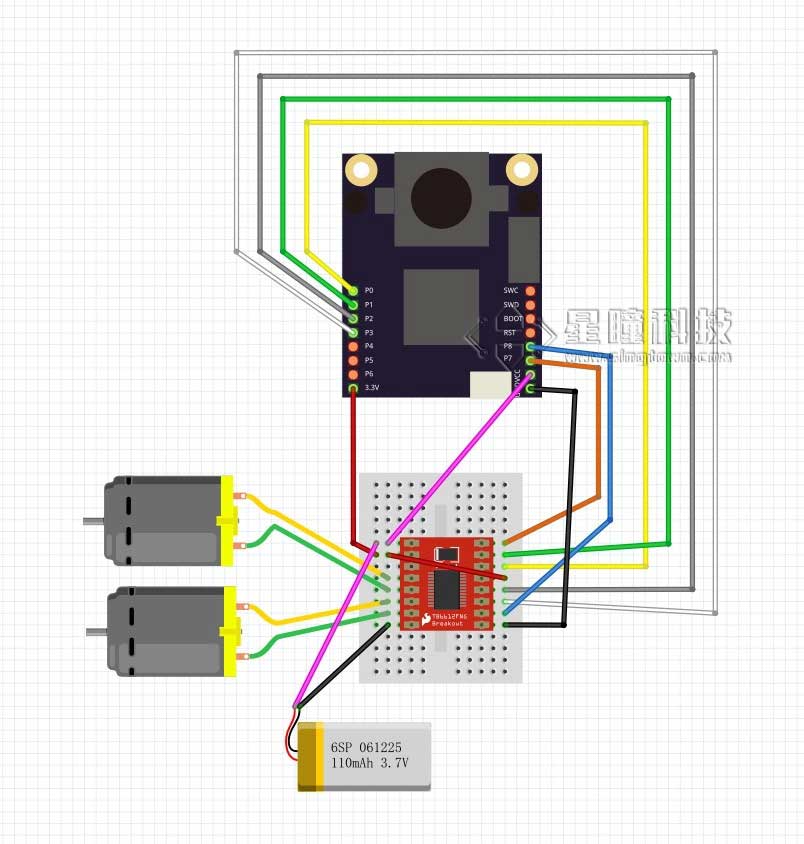
OpenMV电路板x1:
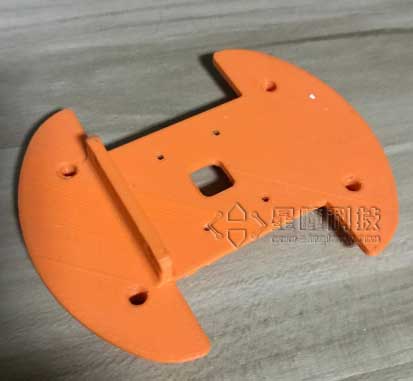
3D打印的小车底板:
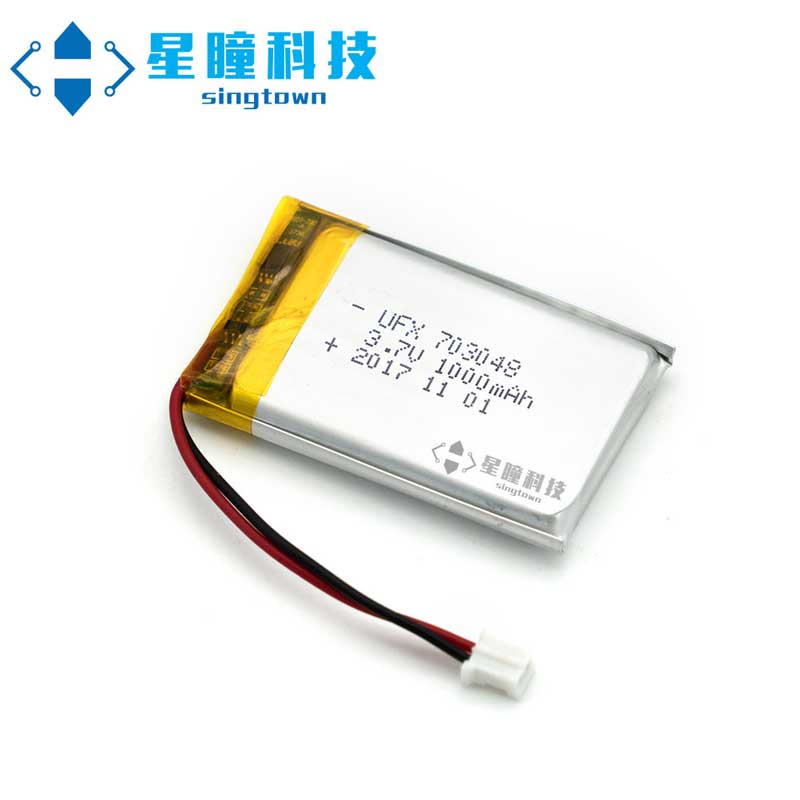
- 3.7V锂电池x1:
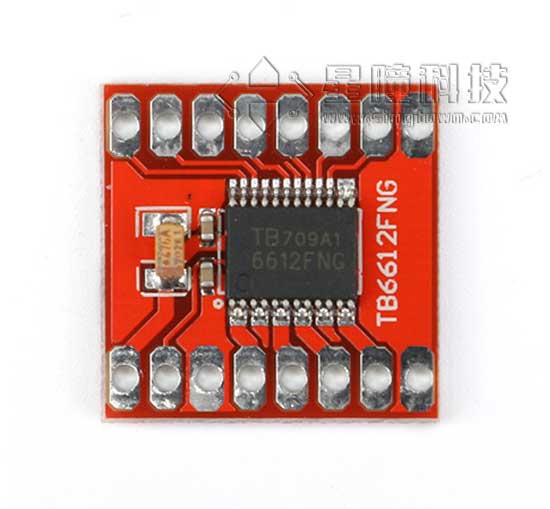
- TB6612电机驱动板x1:
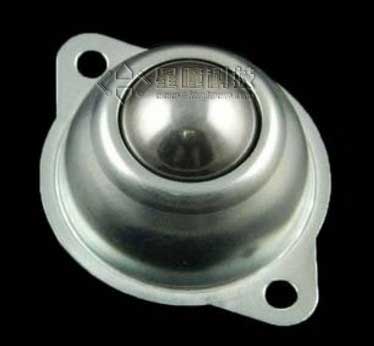
- 牛眼轮x2:
- N20直流电机x2(含固定座,含轮胎):

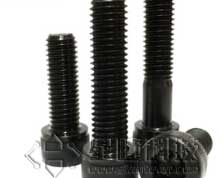
- M3*20螺丝螺母x2:
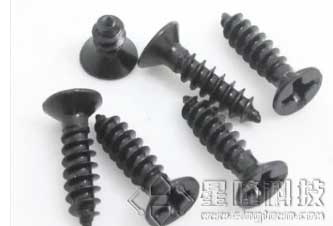
- M2*4自攻螺丝x2
连接电路,测试电机
编写小车的模块
首先要回答一下,为什么要编写模块呢?直接驱动电机也不难啊。 –因为这样代码可重用性最好,控制的逻辑时独立于小车的结构的。 不同的小车,只要更改小车的模块就可以了。
car.py
from pyb import Pin, Timer
inverse_left=False  #change it to True to inverse left wheel
inverse_right=False #change it to True to inverse right wheel

ain1 =  Pin('P0', Pin.OUT_PP)
ain2 =  Pin('P1', Pin.OUT_PP)
bin1 =  Pin('P2', Pin.OUT_PP)
bin2 =  Pin('P3', Pin.OUT_PP)
ain1.low()
ain2.low()
bin1.low()
bin2.low()

pwma = Pin('P7')
pwmb = Pin('P8')
tim = Timer(4, freq=1000)
ch1 = tim.channel(1, Timer.PWM, pin=pwma)
ch2 = tim.channel(2, Timer.PWM, pin=pwmb)
ch1.pulse_width_percent(0)
ch2.pulse_width_percent(0)

def run(left_speed, right_speed):
    if inverse_left==True:
        left_speed=(-left_speed)
    if inverse_right==True:
        right_speed=(-right_speed)

    if left_speed < 0:
        ain1.low()
        ain2.high()
    else:
        ain1.high()
        ain2.low()
    ch1.pulse_width_percent(int(abs(left_speed)))

    if right_speed < 0:
        bin1.low()
        bin2.high()
    else:
        bin1.high()
        bin2.low()
    ch2.pulse_width_percent(int(abs(right_speed)))
将上面的文件保存为car.py, 根据模块的使用,将car.py保存到OpenMV中。
在IDE里测试代码:
main.py
import car

while True:
    car.run(100,100)
看一下小车是不是向前走,如果不是,更改第二行和第三行的的inverse_left和inverse_right来将左轮子或者右轮子反转, 确保小车是正向前进的。
PID算法的实现
pid算法是控制中运用非常多的一个算法,原理网上有很多。
https://zh.wikipedia.org/wiki/PID控制器
http://baike.baidu.com/link?url=-obQq78Ur4bTeqA10bIniO6y0euQFcWL9WW18vq2hA3fyHN3rt32o79F2WPE7cK0Di9M6904rlHD9ttvVTySIK
代码还是很简单的,我是直接copy一个飞控的源码:
https://github.com/wagnerc4/flight_controller/blob/master/pid.py
它是copy ArduPilot的
https://github.com/ArduPilot/ardupilot
pid.py
from pyb import millis
from math import pi, isnan

class PID:
    _kp = _ki = _kd = _integrator = _imax = 0
    _last_error = _last_derivative = _last_t = 0
    _RC = 1/(2 * pi * 20)
    def __init__(self, p=0, i=0, d=0, imax=0):
        self._kp = float(p)
        self._ki = float(i)
        self._kd = float(d)
        self._imax = abs(imax)
        self._last_derivative = float('nan')

    def get_pid(self, error, scaler):
        tnow = millis()
        dt = tnow - self._last_t
        output = 0
        if self._last_t == 0 or dt > 1000:
            dt = 0
            self.reset_I()
        self._last_t = tnow
        delta_time = float(dt) / float(1000)
        output += error * self._kp
        if abs(self._kd) > 0 and dt > 0:
            if isnan(self._last_derivative):
                derivative = 0
                self._last_derivative = 0
            else:
                derivative = (error - self._last_error) / delta_time
            derivative = self._last_derivative + \
                                     ((delta_time / (self._RC + delta_time)) * \
                                        (derivative - self._last_derivative))
            self._last_error = error
            self._last_derivative = derivative
            output += self._kd * derivative
        output *= scaler
        if abs(self._ki) > 0 and dt > 0:
            self._integrator += (error * self._ki) * scaler * delta_time
            if self._integrator < -self._imax: self._integrator = -self._imax
            elif self._integrator > self._imax: self._integrator = self._imax
            output += self._integrator
        return output
    def reset_I(self):
        self._integrator = 0
        self._last_derivative = float('nan')
同样根据模块的使用,将pid.py保存到OpenMV中。
调整参数,实现跟随
主要就是调节PI两个参数,http://blog.csdn.net/zyboy2000/article/details/9418257
THRESHOLD = (5, 70, -23, 15, -57, 0) # Grayscale threshold for dark things...
import sensor, image, time
from pyb import LED
import car
from pid import PID
rho_pid = PID(p=0.4, i=0)
theta_pid = PID(p=0.001, i=0)

LED(1).on()
LED(2).on()
LED(3).on()

sensor.reset()
sensor.set_vflip(True)
sensor.set_hmirror(True)
sensor.set_pixformat(sensor.RGB565)
sensor.set_framesize(sensor.QQQVGA) # 80x60 (4,800 pixels) - O(N^2) max = 2,3040,000.
#sensor.set_windowing([0,20,80,40])
sensor.skip_frames(time = 2000)     # WARNING: If you use QQVGA it may take seconds
clock = time.clock()                # to process a frame sometimes.

while(True):
    clock.tick()
    img = sensor.snapshot().binary([THRESHOLD])
    line = img.get_regression([(100,100)], robust = True)
    if (line):
        rho_err = abs(line.rho())-img.width()/2
        if line.theta()>90:
            theta_err = line.theta()-180
        else:
            theta_err = line.theta()
        img.draw_line(line.line(), color = 127)
        print(rho_err,line.magnitude(),rho_err)
        if line.magnitude()>8:
            #if -40<b_err<40 and -30<t_err<30:
            rho_output = rho_pid.get_pid(rho_err,1)
            theta_output = theta_pid.get_pid(theta_err,1)
            output = rho_output+theta_output
            car.run(50+output, 50-output)
        else:
            car.run(0,0)
    else:
        car.run(50,-50)
        pass
    #print(clock.fps())
如果要制作巡线小车的话,只需利用本程序得到的line对象的theta返回值和rho,(theta代表返回线段的角度, rho代表偏移的距离),利用theta和rho来控制小车角度即可。
rho更重要一些,如果不用theta,只用rho也是可以的。
运行效果图: