例程讲解-08-iris_detection瞳孔识别
视频教程17 - 人眼识别和瞳孔追踪:https://singtown.com/learn/50025/
本例程为 08-Eye_Tracking-iris_detection.py
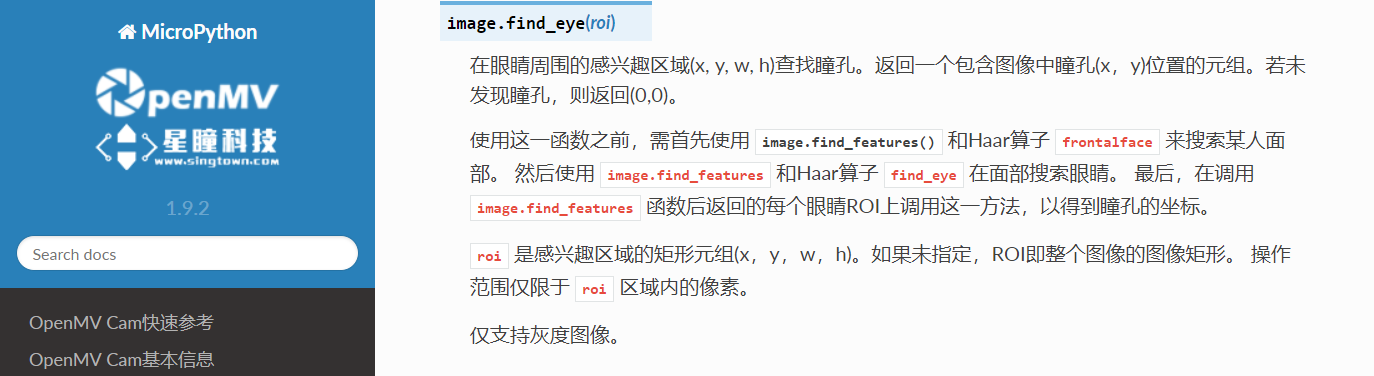
本例程先通过人眼识别找到人眼,然后利用find_eye函数找到瞳孔。find_eye的原理是寻找人眼中颜色最深的地方,即瞳孔。
# 瞳孔识别例程
#
# 这个例子展示了如何找到图像中的眼睛后的瞳孔(瞳孔检测)。 该脚本使用
# find_eyes函数来确定应该包含瞳孔的roi的中心点。 它通过基本上找到瞳孔
# 中心的眼睛最黑暗的区域的中心。
#
# 注意:此脚本首先不会检测到脸部,请将其与长焦镜头一起使用。
import sensor, time, image
#重置传感器
sensor.reset()
#传感器设置
sensor.set_contrast(3)
sensor.set_gainceiling(16)
# 将分辨率设置为VGA。
sensor.set_framesize(sensor.VGA)
#拉近镜头,使眼睛的更多细节展现在摄像头中。
# 裁剪图像到200x100,这提供了更多的细节和更少的数据处理
sensor.set_windowing((220, 190, 200, 100))
sensor.set_pixformat(sensor.GRAYSCALE)
# 加载眼睛的haar算子
# 默认情况下,这将使用所有阶段,较低的阶段更快但不太准确。
eyes_cascade = image.HaarCascade("eye", stages=24)
print(eyes_cascade)
# FPS clock
clock = time.clock()
while (True):
clock.tick()
# Capture snapshot
img = sensor.snapshot()
# Find eyes !
# Note: Lower scale factor scales-down the image more and detects smaller objects.
# 注意:较低的比例因子会进一步缩小图像,并检测较小的物体。
# Higher threshold results in a higher detection rate, with more false positives.
# 阈值越高,检测率越高,假阳性也越多。
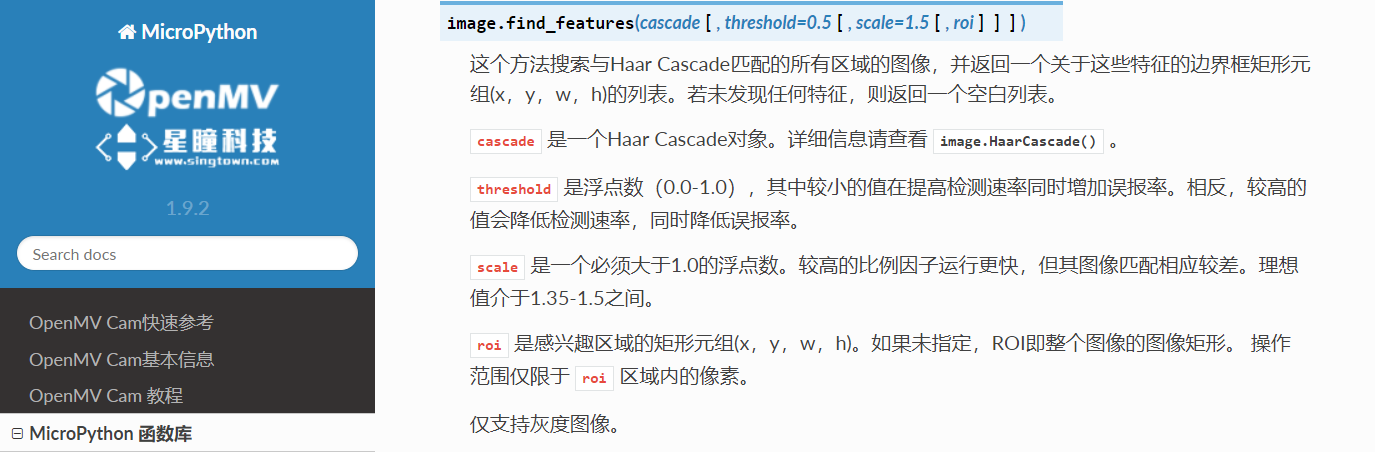
eyes = img.find_features(eyes_cascade, threshold=0.5, scale=1.5)
# 先利用find_features函数识别人眼。image.find_features(cascade, threshold=0.5, scale=1.5),thresholds越大,
# 匹配速度越快,错误率也会上升。scale可以缩放被匹配特征的大小。
# 在识别到的人眼中寻找瞳孔。
for e in eyes:
iris = img.find_eye(e)
#image.find_eye((x, y, w, h)),find_eye的参数是一个矩形区域,左上顶点为
#(x,y),宽w,高h,注意(x,y,w,h)是一个元组,不要漏掉括号()。上行代码中
#的e即代表识别到的眼睛的矩形区域。
#find_eye的原理是找到区域中颜色最深处的中心。
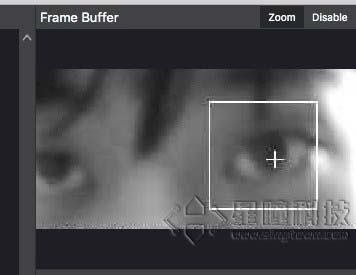
img.draw_rectangle(e)
img.draw_cross(iris[0], iris[1])
#用矩形标记人眼,用十字形标记瞳孔。
# Print FPS.
# 注:实际FPS更高,流FB使它更慢。
print(clock.fps())
运行程序效果如图: