Serial communication II
OpenMV serial port debugging expansion board
The OpenMV serial port debugging expansion board connects the serial port UART3 of OpenMV to the computer through the cp2104 chip, and connects it to the serial port debugging expansion board via USB. You can see the data sent on the serial port UART3 of OpenMV.
https://singtown.com/product/49906
OpenMV and serial debugging expansion board are connected to the computer via 2 USB cables.
Using TTL-USB Module
If you don't have an OpenMV serial debugging expansion board, you can also use a TTL-USB module, which has the same function as the OpenMV serial debugging expansion board.
First of all, we need to understand that the serial ports used by various microcontrollers (including Arduino, OpenMV, esp8266, stm32, 51) are all TTL serial ports! Not rs485, not rs232!
The voltage of the TTL serial port is 3.3V or 5V, the voltage of RS232 is +-15V, and the voltage of RS485 is 5V, but the two data lines are differential lines, the protocols are different, and they cannot be used interchangeably.
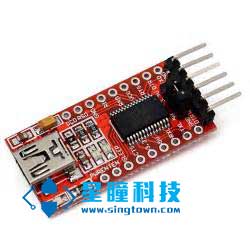
The module we use is a TTL to USB module (the cp2104 module is recommended, which is a little more expensive but of good quality):
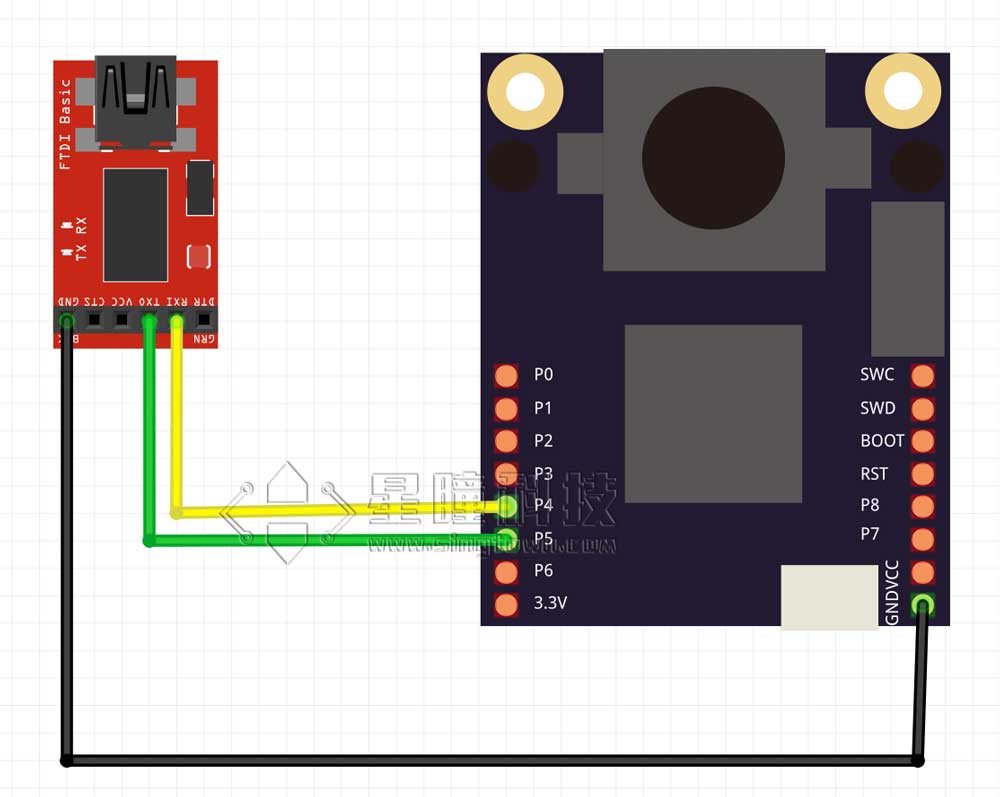
Connection diagram(note common ground and RXTX interlaced connections):
| OpenMV | FTDI |
|---|---|
| P4(TX) | RX |
| P5(RX) | TX |
| GND | GND |
Plug the USB end of the TTL module into the computer and a serial port will appear.
Singtown Serial Port Assistant
First download SingTown Serial Port Assistant:\ https://singtown.com/singtownserialport/
Singtown Serial Port Assistant is an open source serial port assistant that is simple and easy to use and supports Windows, MacOS, and Linux.
Run the program
Note that some software allows you to choose HEX (hexadecimal) or ASC (ascii). You must select ASC to display the string.
Run the uart.write("hello world!") program on the OpenMV (see the previous section).
The serial assistant will display "Hello world!".
If you run the following program:
import sensor, image, time
import json
from machine import UART
#from pyb import UART
# For color tracking to work really well you should ideally be in a very, very,
# very, controlled enviroment where the lighting is constant...
yellow_threshold   = ( 46,  100,  -68,   72,   58,   92)
# You may need to tweak the above settings for tracking green things...
# Select an area in the Framebuffer to copy the color settings.

sensor.reset() # Initialize the camera sensor.
sensor.set_pixformat(sensor.RGB565) # use RGB565.
sensor.set_framesize(sensor.QQVGA) # use QQVGA for speed.
sensor.skip_frames(10) # Let new settings take affect.
sensor.set_auto_whitebal(False) # turn this off.
clock = time.clock() # Tracks FPS.

# OpenMV4 H7 Plus, OpenMV4 H7, OpenMV3 M7, OpenMV2 M4 的UART(3)是P4-TX P5-RX
uart = UART(3, 115200)   #OpenMV RT 注释掉这一行,用下一行UART(1)
#uart = UART(1, 115200)  #OpenMV RT 用UART(1)这行,注释掉上一行UART(3)
# OpenMV RT 只有串口UART(1),对应P4-TX P5-RX; OpenMV4 H7 Plus, OpenMV4 H7, OpenMV3 M7 的UART(1)是P0-RX P1-TX

while(True):
    clock.tick() # Track elapsed milliseconds between snapshots().
    img = sensor.snapshot() # Take a picture and return the image.

    blobs = img.find_blobs([yellow_threshold])
    if blobs:
        #print('sum : %d'% len(blobs))
        data=[]
        for b in blobs:
            # Draw a rect around the blob.
            img.draw_rectangle(b.rect()) # rect
            img.draw_cross(b.cx(), b.cy()) # cx, cy
            data.append((b.cx(),b.cy()))

        #{(1,22),(-3,33),(22222,0),(9999,12),(0,0)}
        data_out = json.dumps(set(data))
        uart.write(data_out +'\n')
        print('you send:',data_out)
    else:
        print("not found!")
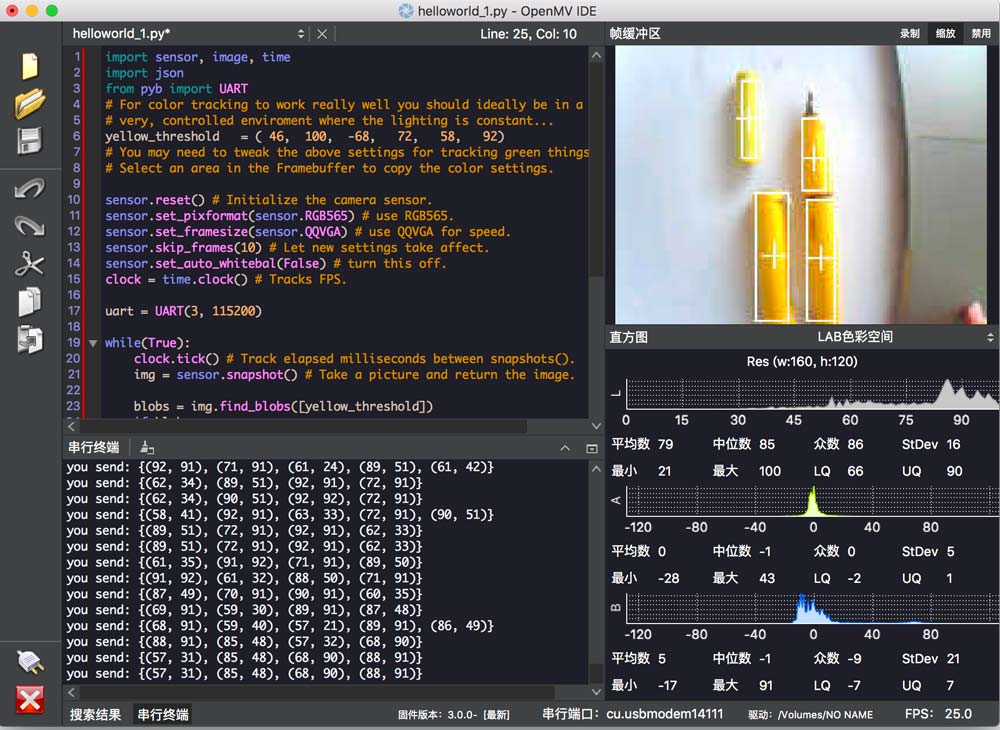
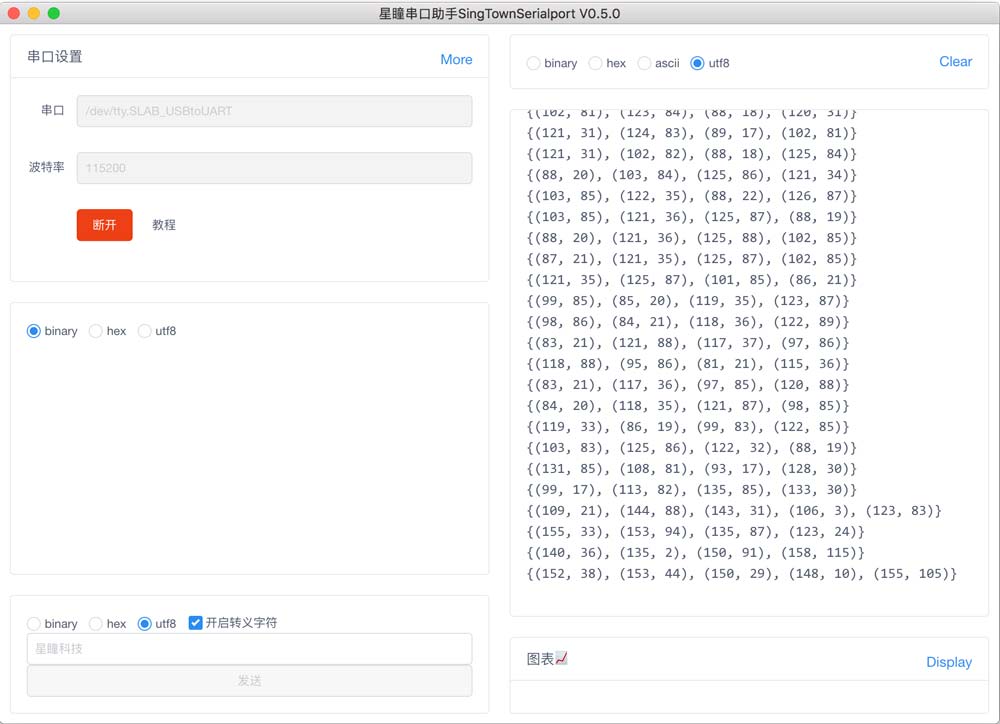
The center coordinates of all color blocks will be sent out.
The Singtown Serial Port Assistant will display the received data:
Arduino parsing program
Because Arduino Uno has only one serial port, one for receiving, it cannot send to the computer for display. So we use software to simulate the serial port to perform the serial port forwarding program.
| OpenMV | Arduino |
|---|---|
| P4(TX) | 10(RX) |
| P5(RX) | 11(TX) |
| GND | GND |
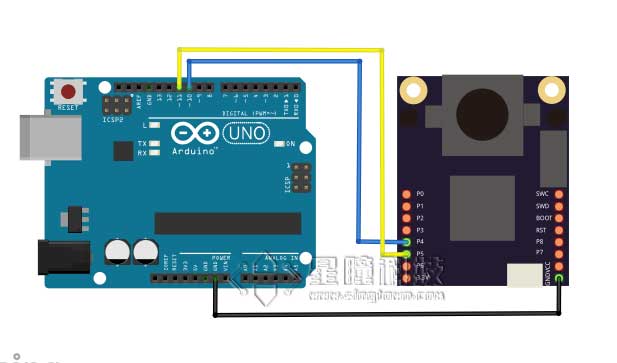
The forwarding logic is as follows: the data from OpenMV is sent to the soft serial port of Arduino Uno, and the serial port of Arduino is connected to the computer and displays the results.
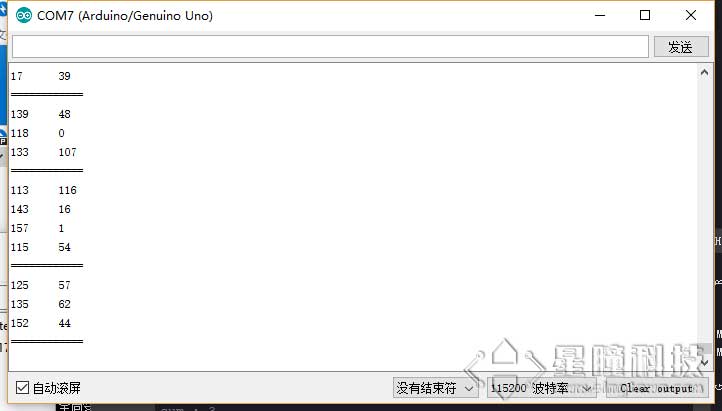
Therefore, the logic of Arduino Mega is: read the data (json) from softSerial, parse it into an array, and send it to Serial(computer).
Code
#include <SoftwareSerial.h>

SoftwareSerial softSerial(10, 11); // RX, TX
typedef struct
{
  int data[50][2] = {{0,0}};
  int len = 0;
}List;
List list;

void setup() {
  // put your setup code here, to run once:
  softSerial.begin(115200);
  Serial.begin(115200);
}

void loop() {
  if(softSerial.available())
  {
    getList();
    for (int i=0; i<list.len; i++)
    {
      Serial.print(list.data[i][0]);
      Serial.print('\t');
      Serial.println(list.data[i][1]);
    }
    Serial.println("============");
    clearList();
  }

}


String detectString()
{
  while(softSerial.read() != '{');
  return(softSerial.readStringUntil('}'));
}
void clearList()
{
  memset(list.data, sizeof(list.data),0);
  list.len = 0;
}
void getList()
{
  String s = detectString();
  String numStr = "";
  for(int i = 0; i<s.length(); i++)
  {
    if(s[i]=='('){
      numStr = "";
    }
    else if(s[i] == ','){
      list.data[list.len][0] = numStr.toInt();
      numStr = "";
    }
    else if(s[i]==')'){
      list.data[list.len][1] = numStr.toInt();
      numStr = "";
      list.len++;
    }
    else{
      numStr += s[i];
    }
  }
}
