Get started in 10 minutes
Video tutorial 1 - Introduction to OpenMV: https://singtown.com/learn/688
Video tutorial 2 - Unboxing introduction: https://singtown.com/learn/49985
Video tutorial 3 - Installation and use of drivers and IDEs: https://singtown.com/learn/49989/
Download software
Official website in China:http://openmv.cc (click Software Download)
Official website in the United States: https://openmv.io/pages/download
Windows
After downloading, keep clicking Next, and the installation is completed
normally.\
If there is no image window, you can drag it out from the right.
Install the driver
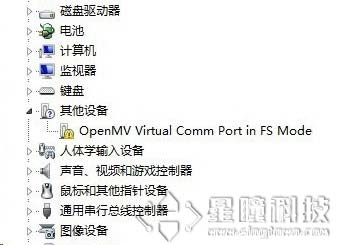
Plug OpenMV into the computer.\ Under normal circumstances, the driver will be installed automatically, and everything does not need to be installed manually. In the device manager, you will see:

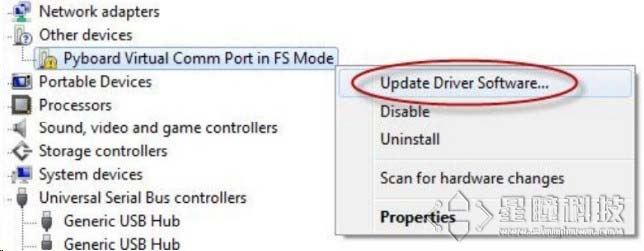
But on some computers, the driver may not be installed automatically.\ At this time, an exclamation mark will appear in the device manager, indicating that the driver is not installed normally.
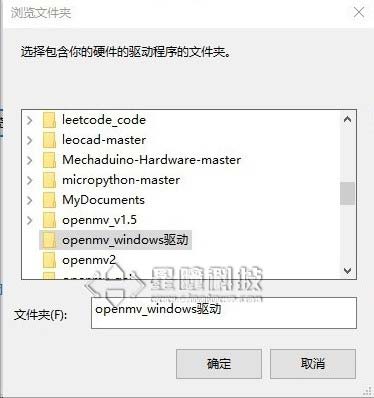
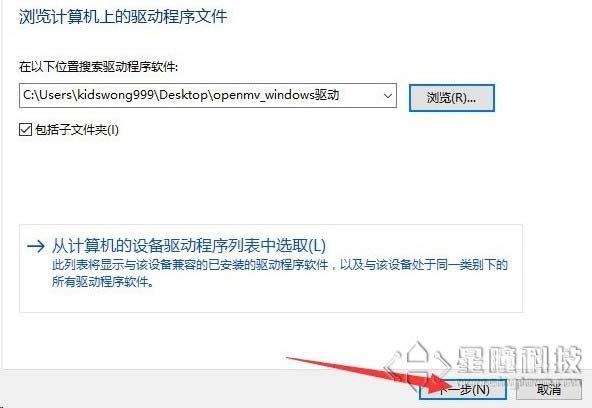
At this time, you need to install it manually.\ First download the driver: https://dl.singtown.com/openmv/openmv_windowsdriver.zip
Unzip to the desktop, then right-click the device in the device manager, and then click Upgrade Driver:


Windows driver installation failure
If the following situation occurs (this rarely happens, it is a computer
failure):\
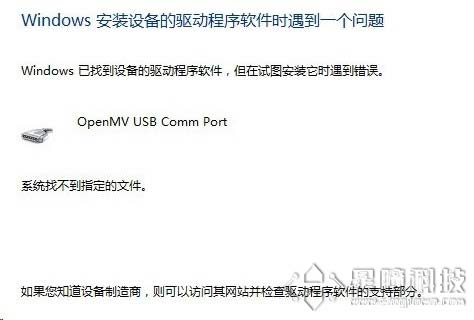
OpenMV driver installation failed, 90% of the time it is a computer problem, the streamlined operating system and the use of some optimization software are usually the cause of such problems. The solution to the OpenMV driver is similar to Arduino.
This is because the streamlined version of the window system deletes some uncommon driver information.
Failure reference:\ https://forum.singtown.com/topic/230
Finally, it is recommended:
- When buying a computer, buy a computer with a genuine system.
- Open Windows Update (it is turned on by default, don't turn it off).
- Even if you use a pirated system, please download the pure and complete version on MSDN.
- Never use Ghost to install the system! 90% of driver problems are caused by Ghost.
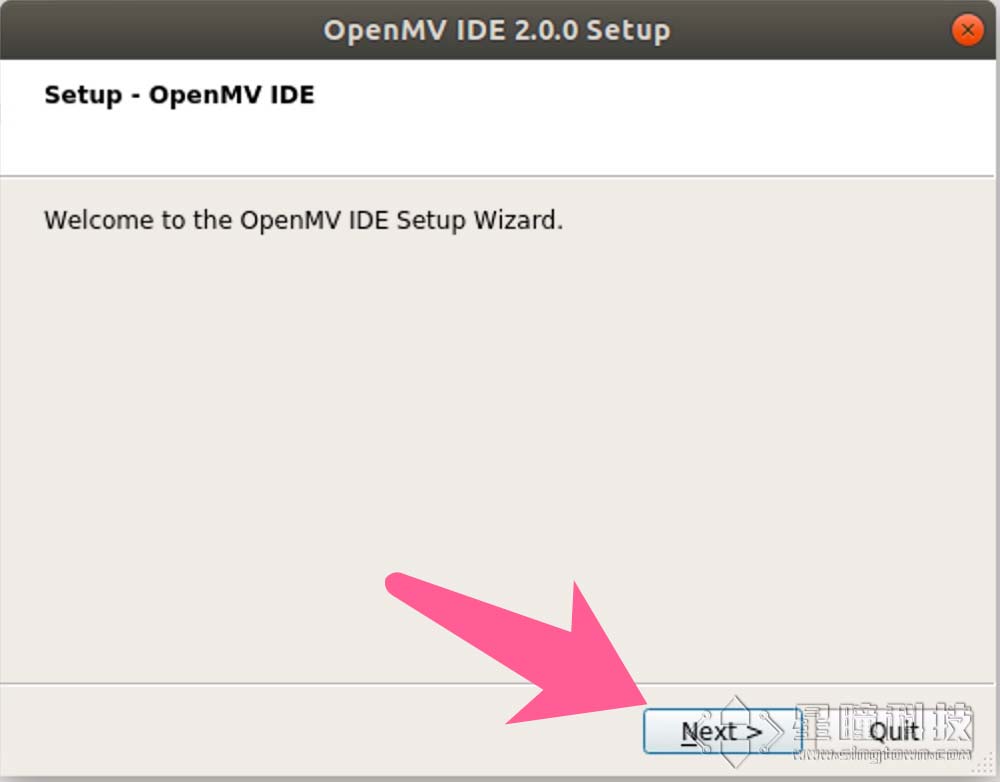
MacOS
After downloading the IDE software, double-click the installer. Just keep clicking Next.
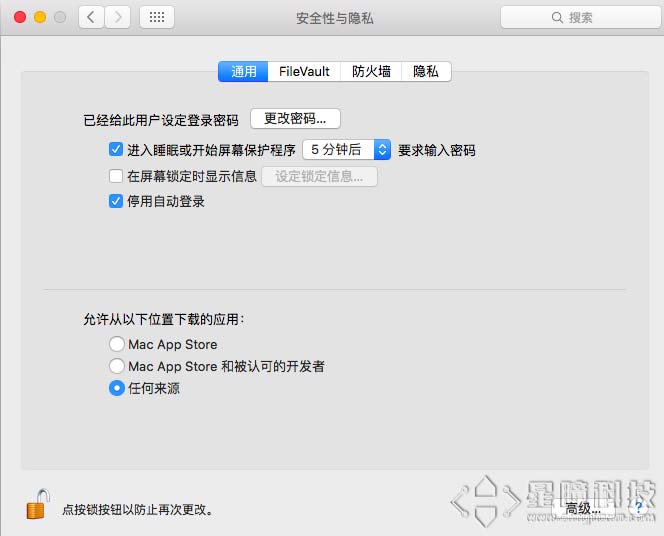
If it says that you can only install apps from the App Store and approved apps,
set it to Any Source in Security and Privacy.\
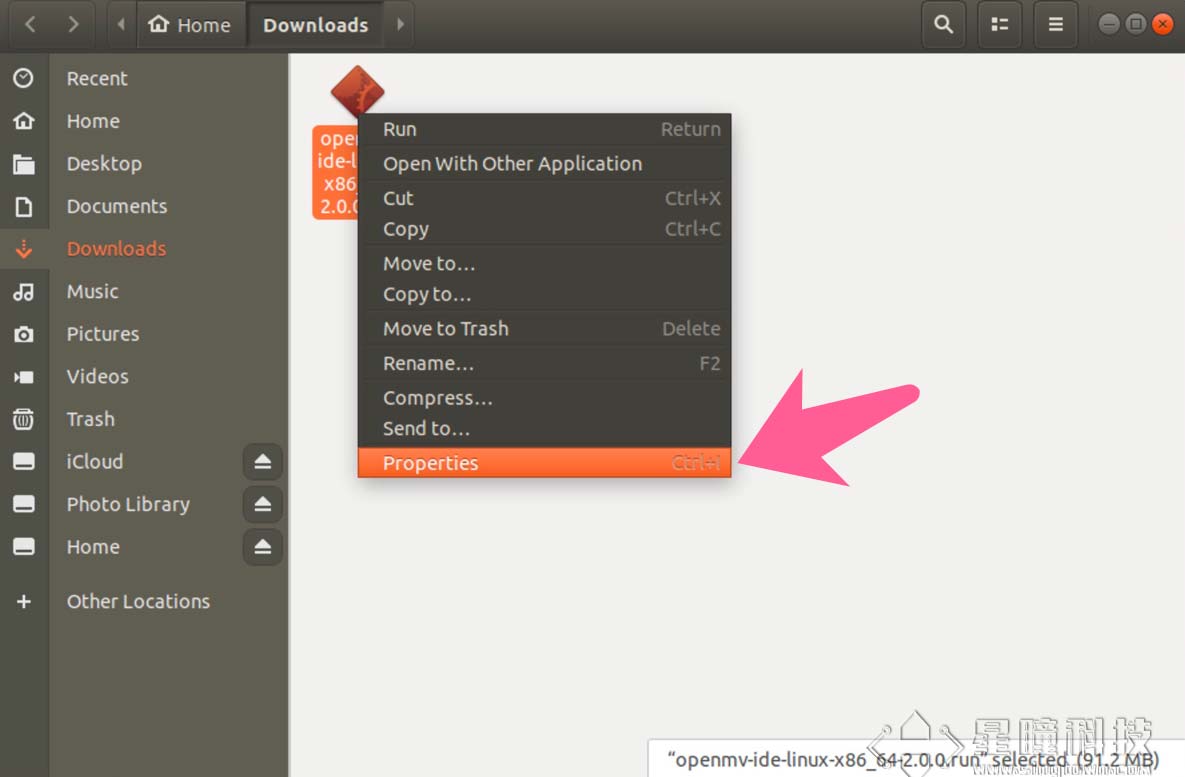
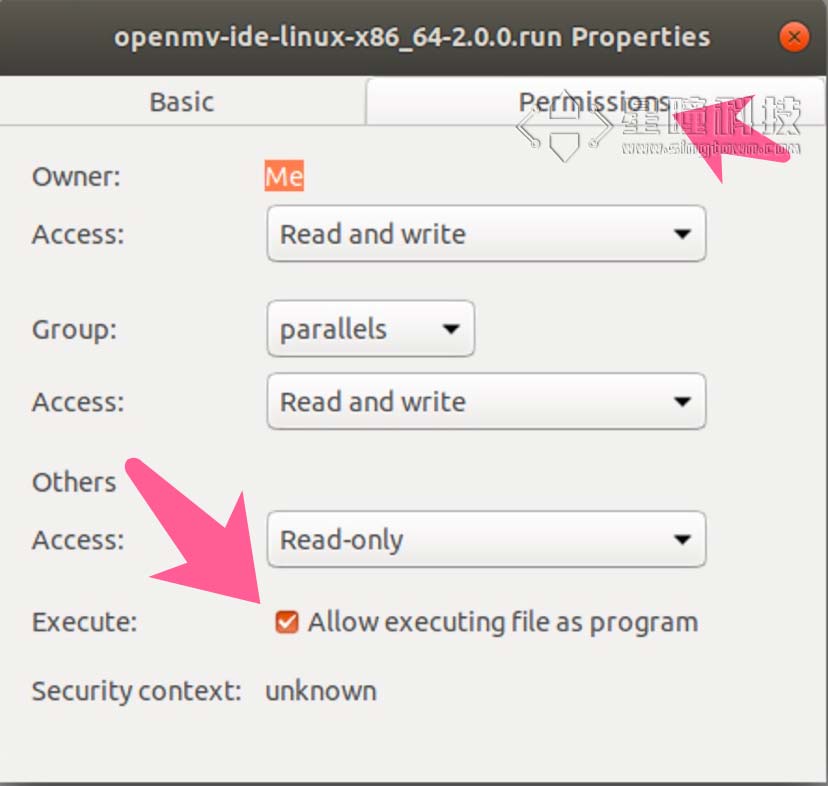
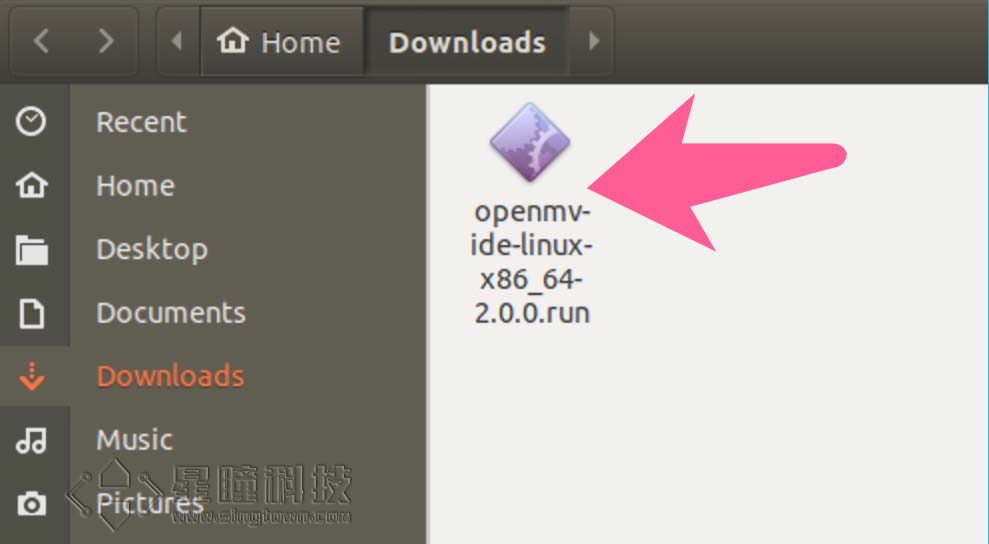
Ubuntu
Ubuntu needs to give permissions to the downloaded file. Then double-click to install.
Run hello world!
First, make sure that the IDE and driver are installed properly.
Plug the OpenMV into the computer via a USB cable, and a USB drive will appear
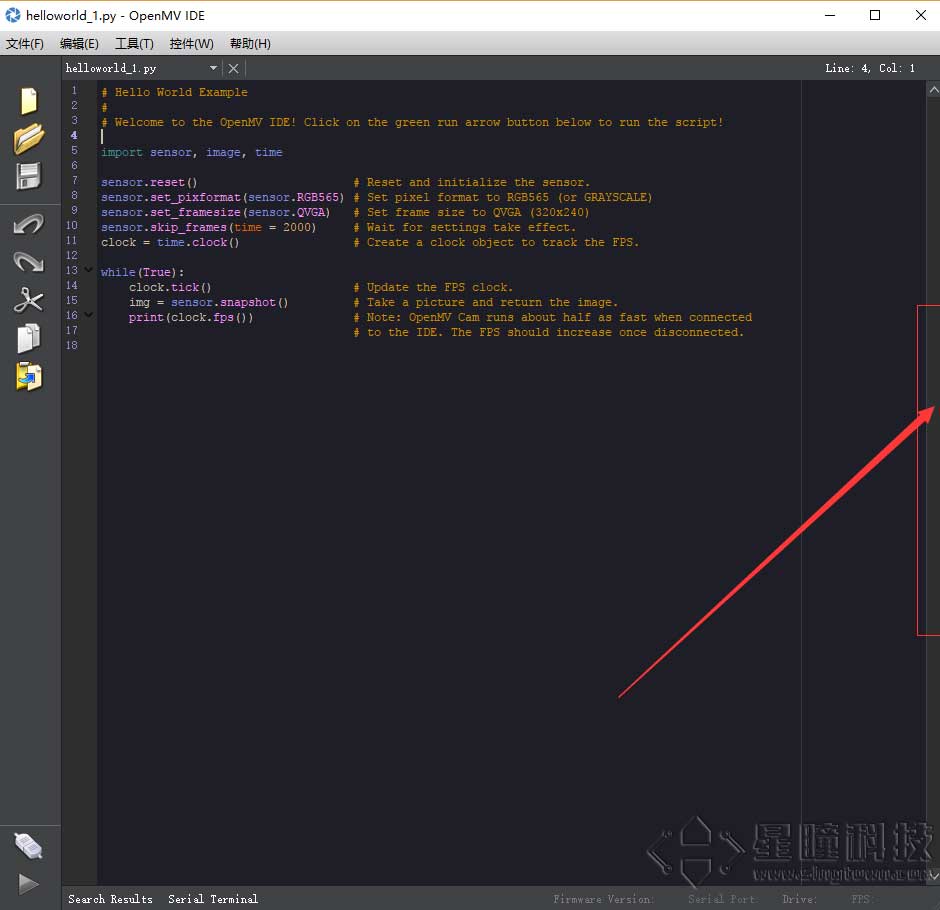
Open OpenMV IDE.
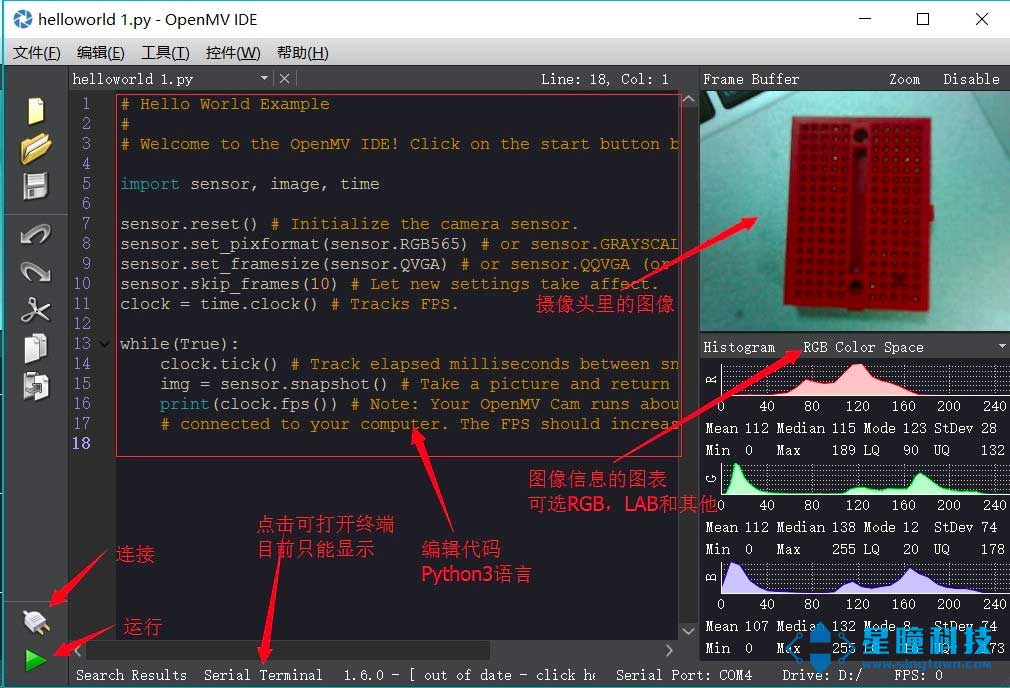
Focus on this picture.
- Click
Connect - and then click
Run
The image is displayed correctly in the image window in the upper right corner.\
Click the Serial Terminal at the bottom, and a terminal window will pop up.\
At the same time, data will be printed in the Serial Terminal. This is the frame
rate. It is the result of executing print(clock.fps()) in line 17 of the code.
Tracking the ball
Delete all the content in the edit box and replace it with the following code:
# 色块监测 例子
#
# 这个例子展示了如何通过find_blobs()函数来查找图像中的色块
# 这个例子查找的颜色是深绿色

import sensor, image, time

# 颜色追踪的例子,一定要控制环境的光,保持光线是稳定的。
green_threshold   = (   0,   80,  -70,   -10,   -0,   30)
#设置绿色的阈值,括号里面的数值分别是L A B 的最大值和最小值(minL, maxL, minA,
# maxA, minB, maxB),LAB的值在图像左侧三个坐标图中选取。如果是灰度图,则只需
#设置(min, max)两个数字即可。

sensor.reset() # 初始化摄像头
sensor.set_pixformat(sensor.RGB565) # 格式为 RGB565.
sensor.set_framesize(sensor.QQVGA) # 使用 QQVGA 速度快一些
sensor.skip_frames(time = 2000) # 跳过2000s,使新设置生效,并自动调节白平衡
sensor.set_auto_gain(False) # 关闭自动自动增益。默认开启的,在颜色识别中,一定要关闭白平衡。
sensor.set_auto_whitebal(False)
#关闭白平衡。白平衡是默认开启的,在颜色识别中,一定要关闭白平衡。
clock = time.clock() # 追踪帧率

while(True):
    clock.tick() # Track elapsed milliseconds between snapshots().
    img = sensor.snapshot() # 从感光芯片获得一张图像

    blobs = img.find_blobs([green_threshold])
    #find_blobs(thresholds, invert=False, roi=Auto),thresholds为颜色阈值,
    #是一个元组,需要用括号[ ]括起来。invert=1,反转颜色阈值,invert=False默认
    #不反转。roi设置颜色识别的视野区域,roi是一个元组, roi = (x, y, w, h),代表
    #从左上顶点(x,y)开始的宽为w高为h的矩形区域,roi不设置的话默认为整个图像视野。
    #这个函数返回一个列表,[0]代表识别到的目标颜色区域左上顶点的x坐标,[1]代表
    #左上顶点y坐标,[2]代表目标区域的宽,[3]代表目标区域的高,[4]代表目标
    #区域像素点的个数,[5]代表目标区域的中心点x坐标,[6]代表目标区域中心点y坐标,
    #[7]代表目标颜色区域的旋转角度(是弧度值,浮点型,列表其他元素是整型),
    #[8]代表与此目标区域交叉的目标个数,[9]代表颜色的编号(它可以用来分辨这个
    #区域是用哪个颜色阈值threshold识别出来的)。
    if blobs:
    #如果找到了目标颜色
        for b in blobs:
        #迭代找到的目标颜色区域
            # Draw a rect around the blob.
            img.draw_rectangle(b[0:4]) # rect
            #用矩形标记出目标颜色区域
            img.draw_cross(b[5], b[6]) # cx, cy
            #在目标颜色区域的中心画十字形标记

    print(clock.fps()) # 注意: 你的OpenMV连到电脑后帧率大概为原来的一半
    #如果断开电脑,帧率会增加
After running the program
This program will search for color blocks based on the threshold of green_threshold.
Change the threshold
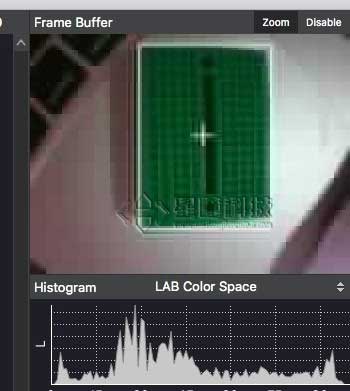
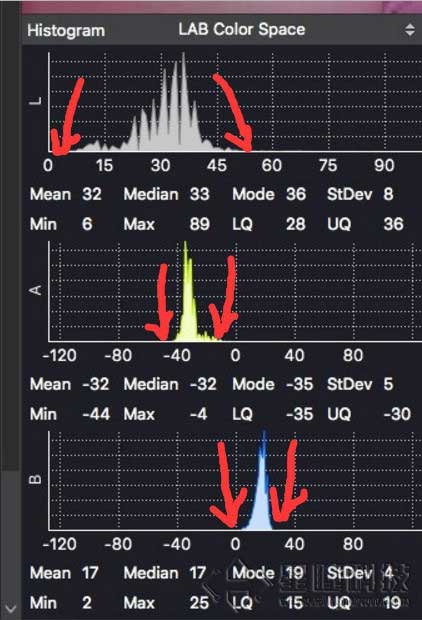
So how do you change this threshold yourself? How do we know the color threshold of our object?
- Number list project First find the target color in the camera, and circle a rectangle on the target color in the framebuffer by left-clicking
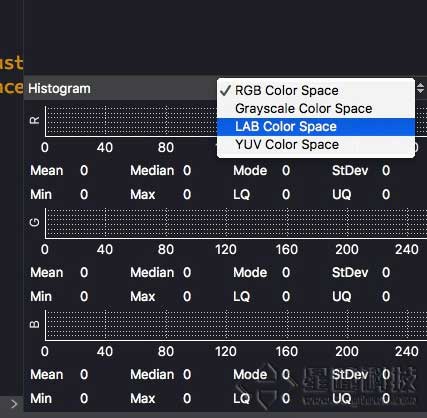
- In the coordinate diagram below the framebuffer, select LAB Color Space.
- The three coordinate diagrams represent the LAB values of the colors in the circled rectangular area, and select the maximum and minimum values of the three coordinate diagrams, that is, (0, 60, -70, -10, -0, 30)
File system
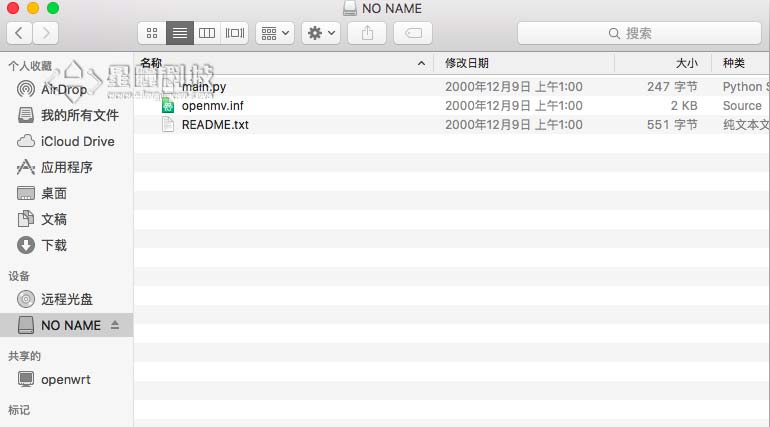
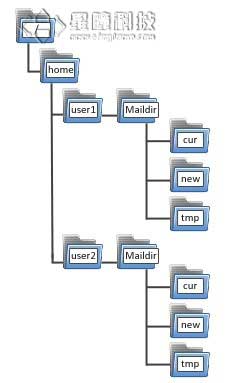
The file system is a particularly outstanding feature of OpenMV (or MicroPython). What is a file system? Simply put, various folders and files are arranged in a tree structure, in simple terms, it is your USB flash drive. And you can use the path in the code to read files, create files, and so on.
Offline operation
Video tutorial attachment 2 - Offline operation: https://singtown.com/video
Then the question is? What is the use of OpenMV supporting the file system?
The answer is, it is quite convenient!\ OpenMV virtualizes the built-in Flash into a file system. When you insert OpenMV into the computer, the computer will pop up a USB flash drive! Inside is the file system of OpenMV. When you want to burn the firmware, just copy the script file to the main.py of this "U disk". Every time you power on, OpenMV will automatically run the main.py inside, so that it can run offline.
One-click download
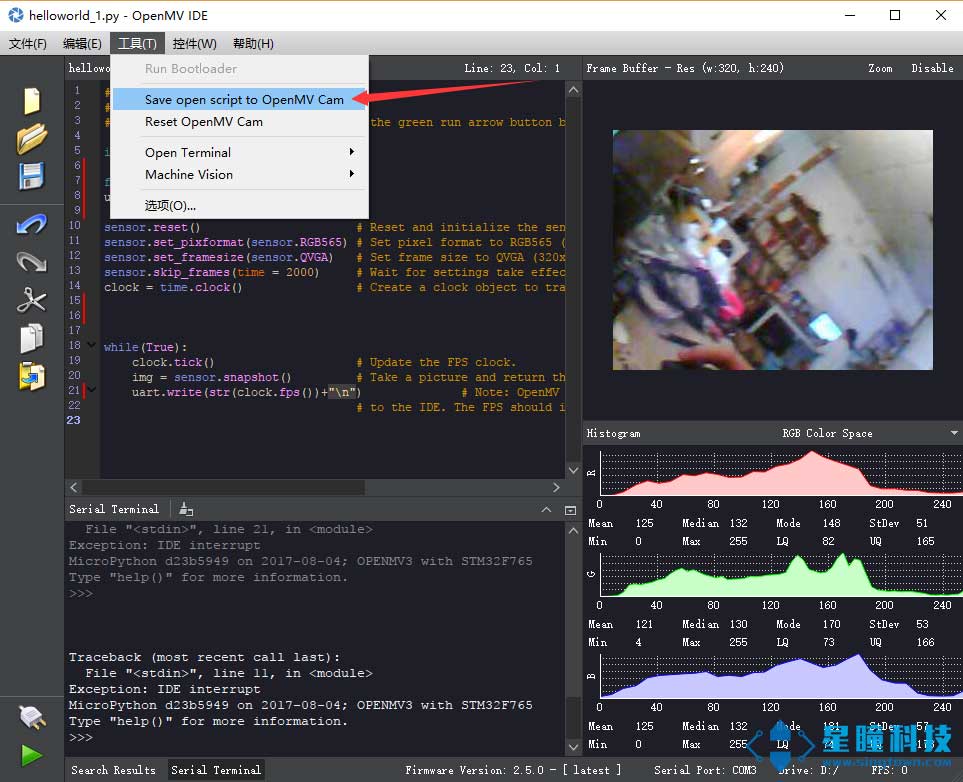
In the toolbar, click to save the opened script to OpenMV Cam (as main.py),
and the IDE will automatically save the current file to main.py, which is very
convenient.
Power supply
OpenMV has two power input terminals:
- VIN (sometimes also marked as VCC)
- USB input
VIN input is 3.6V~5V, 5V is recommended.\ USB and VIN can be powered at the same time.
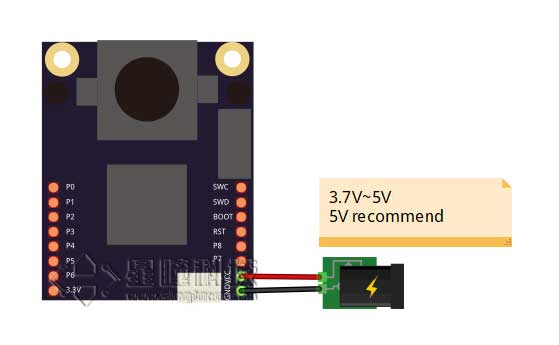
OpenMV has a power output terminal:
- 3.3V, this voltage is output by the regulator of OpenMV, used to power other sensors. Note: Do not directly power 3.3V, without the protection of the internal chip, it is easy to burn.
SD card
What if my code has 100,000 lines and the built-in flash is not enough? What if I want to save pictures?
The answer is, you can use an SD card!
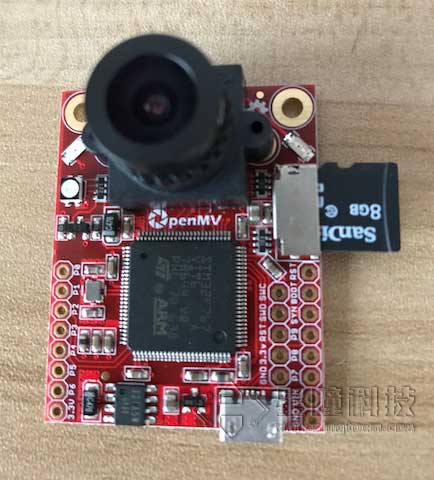
So how to use the SD card? The SD card is also a file system. When the power is
on, if the SD card is inserted, the SD card's file system will automatically
replace the built-in Flash file system. Every time the power is on,the main.py
in the SD cardwill be run. Isn't it very intuitive and convenient? The maximum
capacity of the SD card is 32G.