Distinguish different faces
Video tutorial 19 - Distinguishing different faces:https://singtown.com/learn/50033/
This section shares how to use LBP features to distinguish different faces.
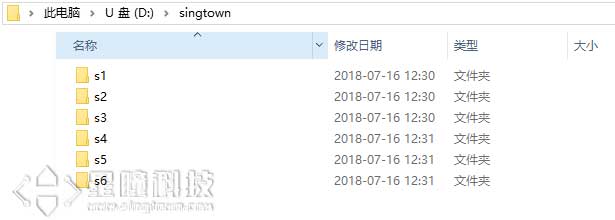
We need to build our own image library first. We first create a new folder in the OpenMV U disk (note that you must insert the SD card) and name it singtown, and then create n subfolders named s1, s2, s3...sn in the singtown folder, where n is the number of people in the entire image library. As shown below:
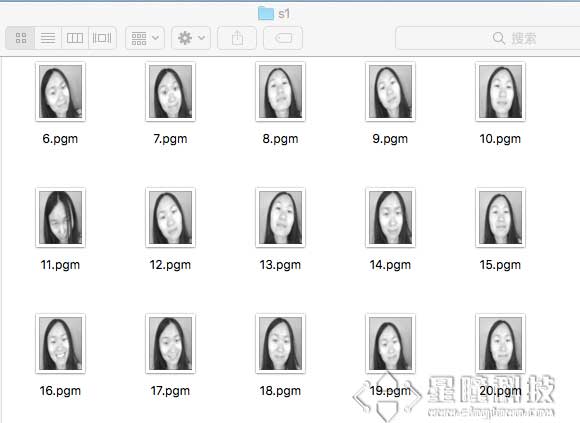
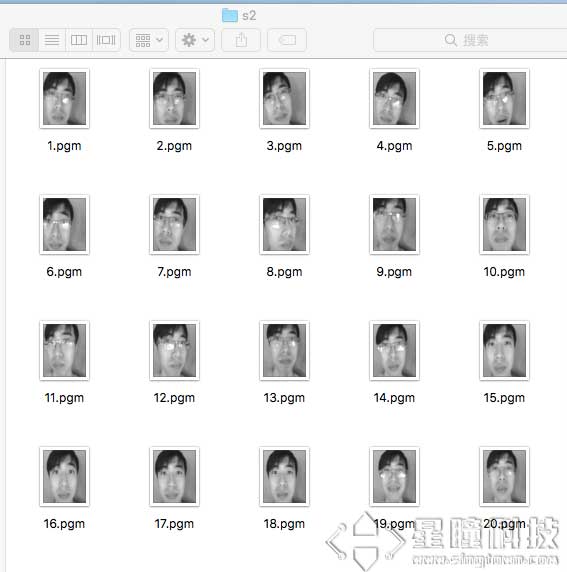
Then, we can run the following code to collect different face samples. Note that when collecting, try to make the background uniform and let the face fill the entire screen as much as possible. The face can be smiling, not smiling, straight, tilted, wearing glasses, not wearing glasses, etc. You can choose 10-20 pictures per person.
# Snapshot Example
#
# Note: You will need an SD card to run this example.
#
# You can use your OpenMV Cam to save image files.

import sensor, image, machine
#import pyb

RED_LED_PIN = 1
BLUE_LED_PIN = 3

sensor.reset() # Initialize the camera sensor.
sensor.set_pixformat(sensor.GRAYSCALE) # or sensor.GRAYSCALE
sensor.set_framesize(sensor.B128X128) # or sensor.QQVGA (or others)
sensor.set_windowing((92,112))
sensor.skip_frames(10) # Let new settings take affect.
sensor.skip_frames(time = 2000)

num = 1 #设置被拍摄者序号,第一个人的图片保存到s1文件夹,第二个人的图片保存到s2文件夹,以此类推。每次更换拍摄者时,修改num值。

n = 20 #设置每个人拍摄图片数量。

#连续拍摄n张照片,每间隔3s拍摄一次。
while(n):
    #红灯亮
    machine.LED("LED_RED").on()
    #pyb.LED(RED_LED_PIN).on()
    sensor.skip_frames(time = 3000) # Give the user time to get ready.等待3s,准备一下表情。

    #红灯灭,蓝灯亮
    machine.LED("LED_RED").off()
    machine.LED("LED_BLUE").on()
    #pyb.LED(RED_LED_PIN).off()
    #pyb.LED(BLUE_LED_PIN).on()

    #保存截取到的图片到SD卡
    print(n)
    sensor.snapshot().save("singtown/s%s/%s.pgm" % (num, n) ) # or "example.bmp" (or others)

    n -= 1

    #pyb.LED(BLUE_LED_PIN).off()
    machine.LED("LED_BLUE").off()
    print("Done! Reset the camera to see the saved image.")
After shooting, the image in the OpenMV U disk is as follows (note that each time the OpenMV U disk writes a new image/file, you need to reset the OpenMV to see it):
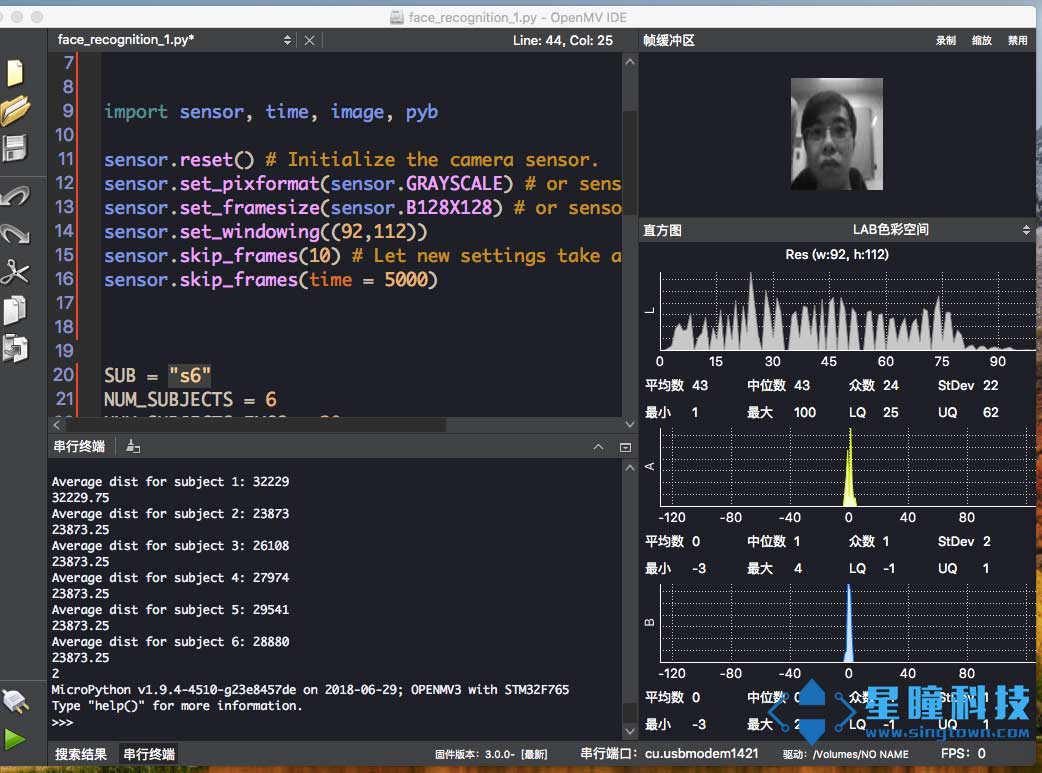
Finally, we run the following code to identify the face in the current camera field of view and output the person who best matches the current object.
# Face recognition with LBP descriptors.
# See Timo Ahonen's "Face Recognition with Local Binary Patterns".
#
# Before running the example:
# 1) Download the AT&T faces database http://www.cl.cam.ac.uk/Research/DTG/attarchive/pub/data/att_faces.zip
# 2) Exract and copy the orl_faces directory to the SD card root.


import sensor, time, image

sensor.reset() # Initialize the camera sensor.
sensor.set_pixformat(sensor.GRAYSCALE) # or sensor.GRAYSCALE
sensor.set_framesize(sensor.B128X128) # or sensor.QQVGA (or others)
sensor.set_windowing((92,112))
sensor.skip_frames(10) # Let new settings take affect.
sensor.skip_frames(time = 5000) #等待5s


#SUB = "s1"
NUM_SUBJECTS = 6 #图像库中不同人数,一共6人
NUM_SUBJECTS_IMGS = 20 #每人有20张样本图片

# 拍摄当前人脸。
img = sensor.snapshot()
#img = image.Image("singtown/%s/1.pgm"%(SUB))
d0 = img.find_lbp((0, 0, img.width(), img.height()))
#d0为当前人脸的lbp特征
img = None
pmin = 999999
num=0

def min(pmin, a, s):
    global num
    if a<pmin:
        pmin=a
        num=s
    return pmin

for s in range(1, NUM_SUBJECTS+1):
    dist = 0
    for i in range(2, NUM_SUBJECTS_IMGS+1):
        img = image.Image("singtown/s%d/%d.pgm"%(s, i))
        d1 = img.find_lbp((0, 0, img.width(), img.height()))
        #d1为第s文件夹中的第i张图片的lbp特征
        dist += image.match_descriptor(d0, d1)#计算d0 d1即样本图像与被检测人脸的特征差异度。
    print("Average dist for subject %d: %d"%(s, dist/NUM_SUBJECTS_IMGS))
    pmin = min(pmin, dist/NUM_SUBJECTS_IMGS, s)#特征差异度越小,被检测人脸与此样本更相似更匹配。
    print(pmin)

print(num) # num为当前最匹配的人的编号。
The running results are shown in the figure: